Another Way to Elevate your Jupyter Notebook Experience
Additional useful features to enhance jupyter notebook that is not mentioned enough
Additional useful features to enhance jupyter notebook that is not mentioned enough
I have written some of the most useful features to be implemented on our Jupyter Notebook here, but I want to expand it more into some of the features that rarely seen implemented in the Jupyter Notebook (or at least in my knowledge). So here it is.
Jupyter Theme
If you did not like the vanilla jupyter theme or just bored with it, you could actually change the theme. Although, I rarely change my Jupyter Notebook theme because I prefer default form the best. As a starter, you need to install the prerequisite module first.
# install jupyterthemespip install jupyterthemesIf you want to access all the jupyterthemes documentation, you could read it here.
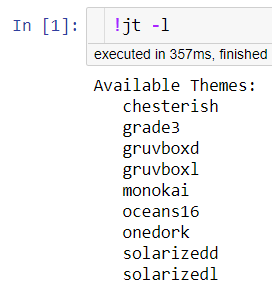
To modify our jupyter notebook environment using jupyterthemes, we can use the jupyter notebook or using the CLI. Let’s try to view all the available themes. In the CLI, we access the jupyterthemes using the jt command. By Using ! on the jupyter notebook, we could typing just like we are in the CLI
#accessing all the jupyter themes!jt -lIf we want to change our themes, we could change it using the command below.
#For example, I want to change it to chesterish theme!jt -t chesterish#Or change it to gruvboxl theme!jt -t gruvboxlIf you want to revert back to the default theme, you could just type this line.
#Reset the change!jt -rJust like that, we going back to our original theme. I personally prefer the default theme because the color is nice to my eyes and if you realize when we change the theme; all the usual shortcut icons are gone. I am the type of person that likes to use that icon rather than using the keyboard shortcut, that is why I prefer the default one.
Auto Import
If you are too lazy to type every important library you would use in the Jupyter Notebook (e.g. Pandas, Numpy, Matplotlib, etc.), we could actually set up an environment where we already had all this library imported in our Jupyter Notebook. Technically what I would explain in this section is not part of any extension available out there, but it is still a way to elevate our Jupyter Notebook experience.
The steps are simple enough to do, they are:
Locate
~/.ipython/profile_defaultfolder, it is usually in your user folderInside the folder, if there is no folder called a startup, create one
In the startup folder, create a new python file (you can name it anything, but I prefer to name it as
start.pyWrite your intended library to be imported in this file and every time you start Jupyter notebook, it would automatically be imported
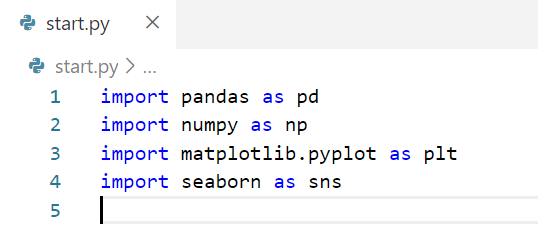
For example, in the start.py I would write my auto imported library like this
When I start my notebook, I do not need to import these libraries above and directly done my work.
If you want to confirm if the libraries have been loaded, you could do that by inspecting the environment usingglobals() in your Jupyter Notebook.
Qgrid
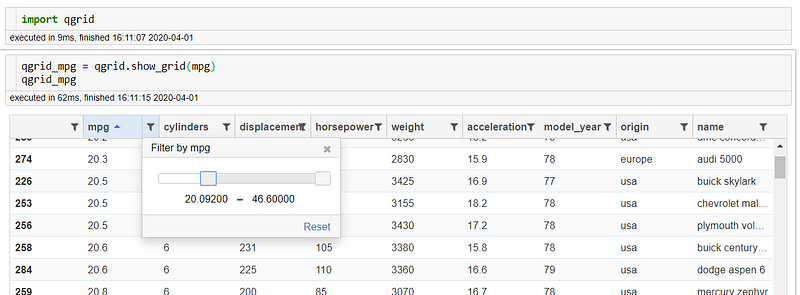
Qgrid is a Jupyter Notebook widget that improves our pandas Dataframe layout. This widget allows us to scroll, sorting and filtering controls, as well as edit our Dataframe by double-clicking cells. To enable qgrid, we need to install it first.
pip install qgridjupyter nbextension enable --py --sys-prefix qgrid# only for the first time if you have not enabled the ipywidgets nbextensionjupyter nbextension enable --py --sys-prefix widgetsnbextensionAn example of how we use qgrid is shown below.
Just by using the functionshow_grid from the qgrid, we already have a different Dataframe experience compared to the default one. Here we could sort and filter our data with more flexibility.
RISE
RISE is a plugin to create and edit our Jupyter Cell notebook into an interactive slideshow. If you realize we could create a slideshow in our Jupyter Notebook which is located under the View -> Cell Toolbar -> Slideshow. The weakness of this method is that we need to run additional commands in separate screens to create the slideshow and the cells are not tweakable.
This is where RISE coming in, by using this plugin we could create an interactive slideshow in our Jupyter Notebook. First, we need to install and enable all the important stuff.
#Installing using condaconda install -c damianavila82 rise#or using pippip install rise#enable the nbextension:jupyter-nbextension install rise --py --sys-prefixjupyter-nbextension enable rise --py --sys-prefixNow we ready to use RISE to create our slideshow. Here is how it works.
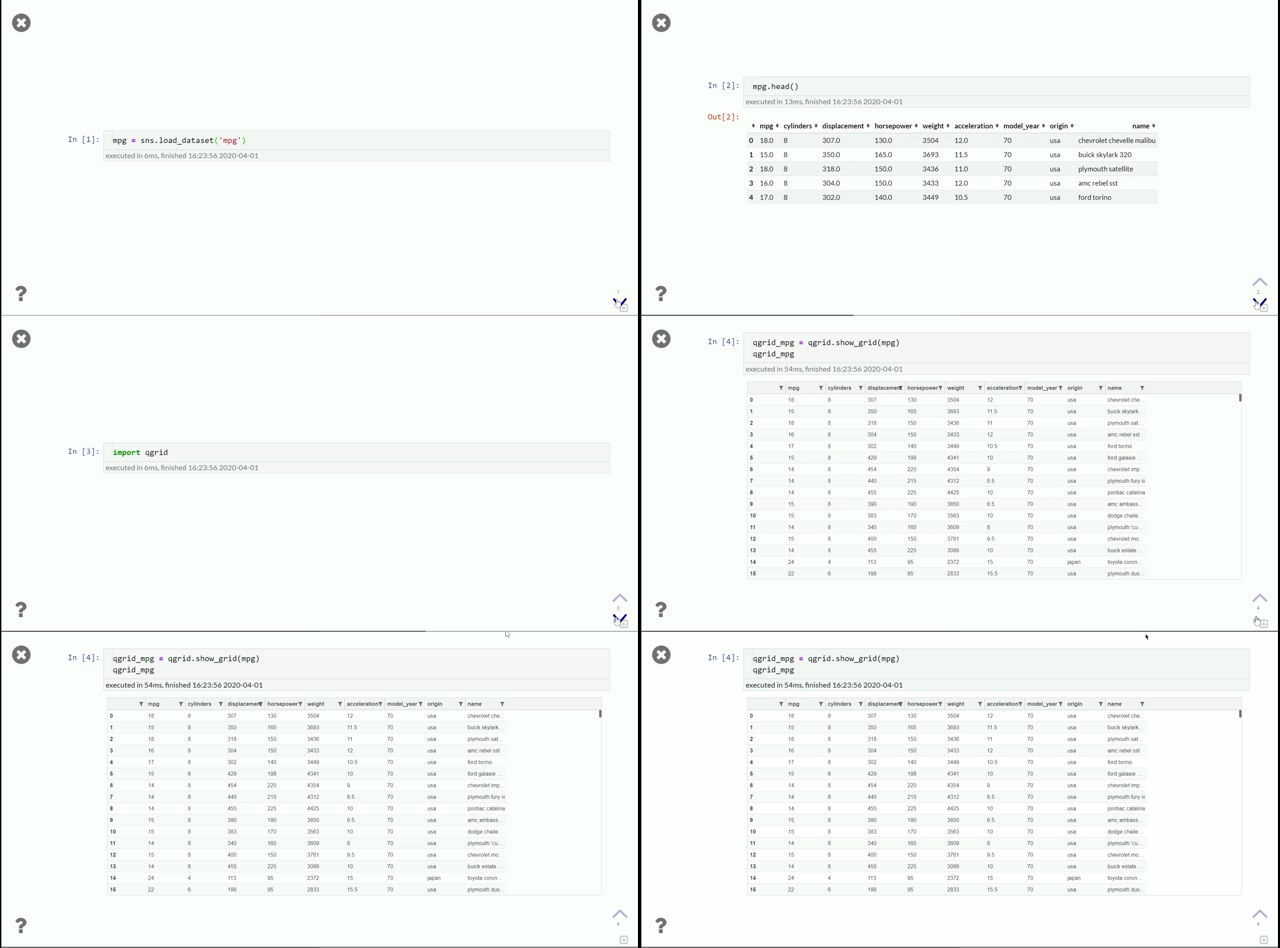
Below is how it looks like after we finish create our slideshow and using the RISE. The best part about using RISE is that we could edit our code here during the slideshow.
Conclusion
Here I show you some of the features that rarely used in Jupyter Notebook but actually quite useful in our everyday Data Science work. Hope it helps!


