Automatic Feature Selection and Creating Highly Interpretable Models with Auto-ViML
Easy feature selection for your model creation
Easy Feature selection for your model creation

As a Data Scientist, one of our work responsibilities will consist of data cleaning and predictive model development. This is, after all, why we get paid.
The job might be fun for some people, but it is a hassle for others. I know many data enthusiasts and data scientists have complained about how hard it is to do data cleaning, feature engineering, and select which features to train their machine learning.
In this case, I recently found out about Auto-ViML, an open-source project that helps us create a new feature, select the features, and build a highly interpretable model based on the features.
You could visit the article by Dan Roth here regarding the introduction of Auto-ViML, but in this article, I want to focus more on the specific case that I used; Feature Selection.
Auto-ViML Usage
For starters, let’s take a dataset example we would use for creating a prediction model. I would take an mpg dataset, which I often used.
import pandas as pdimport seaborn as snsmpg = sns.load_dataset('mpg')mpg.head()Let’s say from this dataset, I want to predict the mpg. In this case, we would build a regression model.
You might think that we could do some feature engineering from this dataset to improve the metrics. In this case, I would use an automation feature engineering with featuretools to help me create the features. If you want to know about featuretools, you could visit my article below.
Easy Automated Feature Engineering For Machine Learning Model
Automate the painful part of the model developmenttowardsdatascience.com
First, I prepare the data that I would use as the training data and the target.
mpg.dropna(inplace = True)mpg.reset_index(drop = True,inplace = True)X = mpg[['cylinders', 'displacement', 'horsepower', 'weight', 'acceleration', 'model_year', 'origin']].copy()y = mpg['mpg'].copy()Next, I would do the feature engineering using the featuretools.
import featuretools as ft#Setting the entity basees = ft.EntitySet(id = 'model_mpg')es.entity_from_dataframe(entity_id = 'training', dataframe = X, make_index = True, index = 'index')#Setting the ID based for feature engineeringes.normalize_entity(base_entity_id= 'training', new_entity_id= 'cylinders', index= 'cylinders')es.normalize_entity(base_entity_id= 'training', new_entity_id= 'model_year', index= 'model_year')es.normalize_entity(base_entity_id= 'training', new_entity_id= 'origin', index= 'origin')#Deep Feature Syntheticfeature_matrix, feature_defs = ft.dfs(entityset = es, target_entity= 'training',agg_primitives= ['skew', 'count', 'std', 'mean', 'median', 'mode', 'max', 'min'],trans_primitives = ['add_numeric', 'multiply_numeric'])feature_matrix.info()We use the 7 columns for training data, and we end up with 100 columns after feature synthetic. This is a good start, but obviously, it would lead to high variance with many features, overfitting. We want to avoid that; that is why we need feature selections.
In this case, we could use Auto-ViML to help us select the important feature and create a prediction model for us. Let’s start using this package.
Before we start, we need to install the Auto-ViML package.
#To use the most recent versionpip install autoviml --upgrade --ignore-installedAfter we are installing the package, we can start using Auto-ViML. Let me show you how it is done by using the following code.
First, make sure that our target data is already in the training data.
feature_matrix['mpg'] = yWe would then use the Auto-ViML package to help us with feature selection and create the prediction model.
from autoviml.Auto_ViML import Auto_ViML#Auto_ViML have 4 output (The best model, important feature, modified train data, modified test datamodel, features, trainm, testm = Auto_ViML(#We put our train data in the train and specify the target in the target parameter. As we do not have external test data and sample submission, we could leave it blanktrain = feature_matrix,target = "mpg",test = "",sample_submission = "",#We set the hyperparameter search to RS (Randomized Search) for faster model creation. We set the scoring foxus to RMSE as this is regression case and boosting flag as False to using the Random Forest or True to use XGBoost Tree. We also use the feature reduction as True. hyper_param="RS",feature_reduction=True,scoring_parameter="RMSE",Boosting_Flag=True,verbose = 2)After executing the code above, the feature selection process and model creation would start. Let’s see a few important things regarding feature selection.
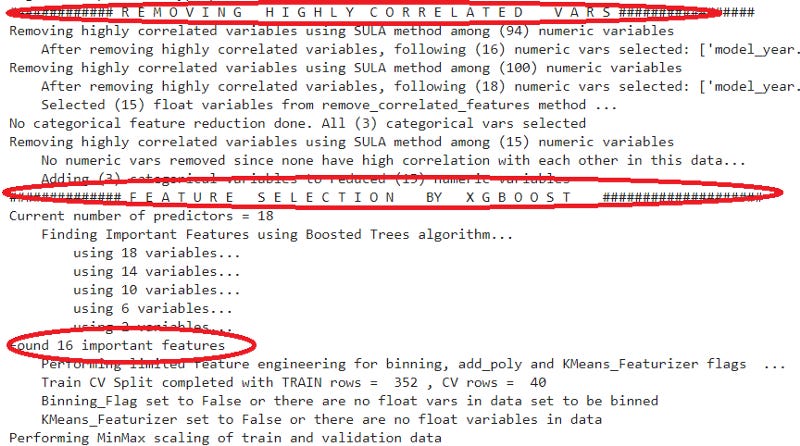
There are some steps that Auto_ViML has done to select the important features. The steps are involving removing highly correlated variables and using important features from XGBoost Tree Algorithm. Using all this method, from 106 features, we only ended up with 16 important features.
This is how Auto-ViML helps us select the features we might use to develop the model ourselves.
After the model development is done, we would end up with several model reports and the feature importance from the feature we use. The example is shown below.
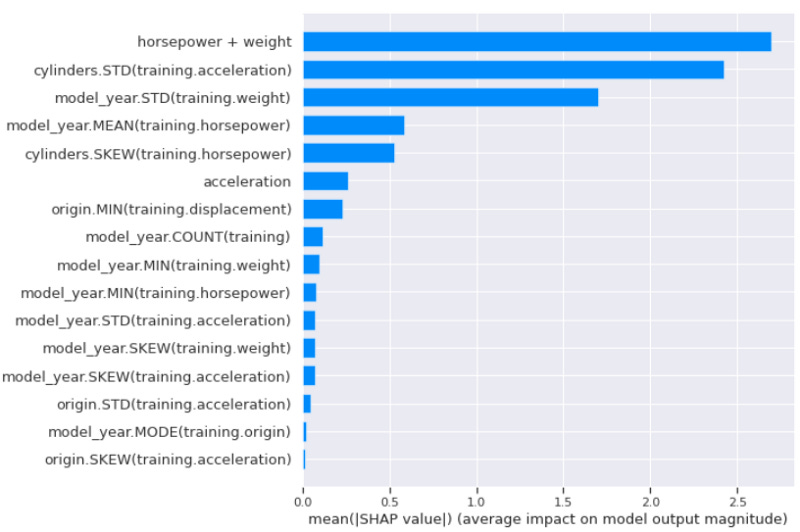
If we input the verbose parameter to “2”, we would end up with the SHAP feature importance.
From the example, we end with Horsepower + Weight as the most important feature from the SHAP value. It seems that this feature is related to the mpg prediction.
If you want to see the features used in the Auto_ViML model creation, you could see it in the features variable we create.
featuresIf you want to check the best model we end up with, we can check it in our model variable we created previously.
modelThis is the best model using the XGBRegressor we end up with. You could check the other developed model in the report.
Featurewiz
In the case you only need the Feature Selection capability of Auto-ViML without any modeling process, we could use another package developed by the Auto-ViML team called Featurewiz.
Featurewiz using two back-to-back methods to remove any unnecessary features. They are SULOV (Searching for Uncorrelated List of Variables) followed by the Recursive XGBoost method. You could visit the Featurewiz homepage for detail on how the features are selected.
To use Featurewiz, we need to install the package first. You can run the following code to install the necessary package.
pip install featurewizNext, let’s try to apply the Feature selection functionality from Featurewiz on our previous feature_matrix variable. We can make the selection by running the following code.
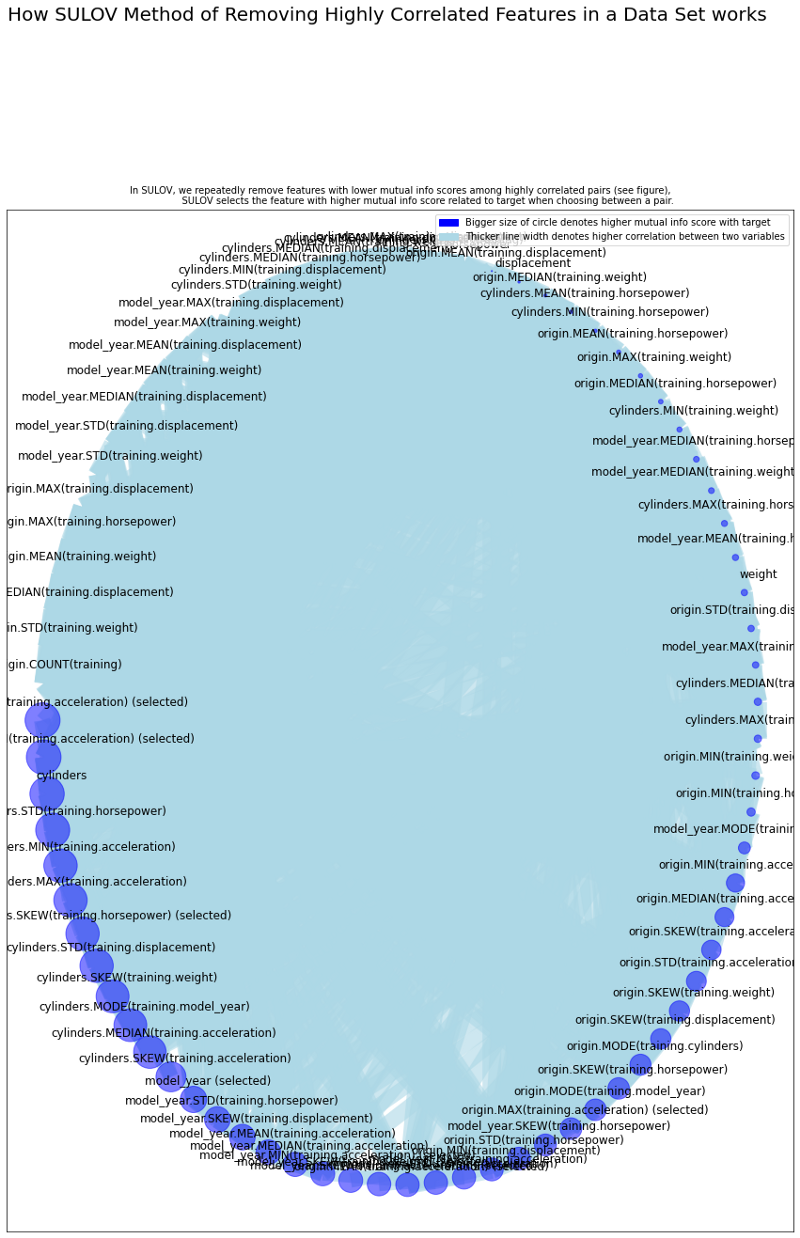
#import the functionfrom featurewiz import featurewizfeatures = featurewiz( #Set the dataset you want to do the feature selection dataname= feature_matrix, #Set the target column target = 'mpg', #Set threshold for removing variables, the threshold is based on Pearson correlation corr_limit=0.7, verbose=2)In the first few lines, we end up with the feature selection process. While it happens, when we set up the verbose = 2, we could show how the SULOV method selecting features as well.
Running the above code would produce the result just as the above picture. In this picture, we get the overall information process of which variables are removed and the SULOV graph showing how the highly correlated variables are eliminated.
The picture seems full because we have so many features, but the higher the blue circle would denote a higher correlation with the target.
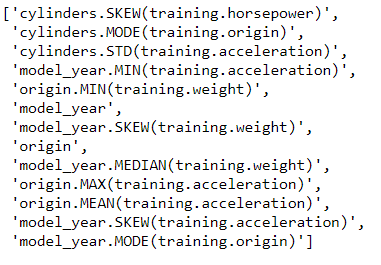
To access all the selected features, we need to open the result in the variable we have set up before for the featurewiz result.
featuresConclusion
Creating a good prediction model means we need to have good features. Doing feature engineering sometimes requires too many noisy features that affect model performance.
We could use the Auto-ViML to help us make the feature selections and create the prediction model.
If we only want to access the Feature Selection function of the Auto-ViML, we could use the Featurewiz package.
I hope it helps!


